Smart Slider Plugin
A slider plugin allows you to display a slideshow on your website, and at Nerd Crossing our favorite is ‘Smart Slider’, and looking at the active installation numbers we are not the only ones. We like its simplicity, it’s range of features and the lack of constant pushing to upgrade which some plugins do.

One concept you have to understand with sliders is that you create and edit them in the admin area in their own section – not on the page you want to display them on. One reason for this is it would allow you to create one slider and have it on multiple pages. You don’t want to create the slider on each page then have to edit multiple versions of the same thing! Also the slider settings are pretty comprehensive and beyond what can be displayed on the regular page editing options. So we would create (and edit) sliders in the slider section and on the page (or post) edit page we tell it to insert the slider we want.
After installing the plugin go to ‘Smart Slider’ in the main menu and the welcome screen very helpfully has a video on how to get started with Smart Slider 3:

After watching (optional, you always just follow along our instructions), click the ‘Go To Dashboard’ button and we will get started adding a test slideshow!
At the top of the dashboard you will see a list of your slideshows. We want to add a new project:

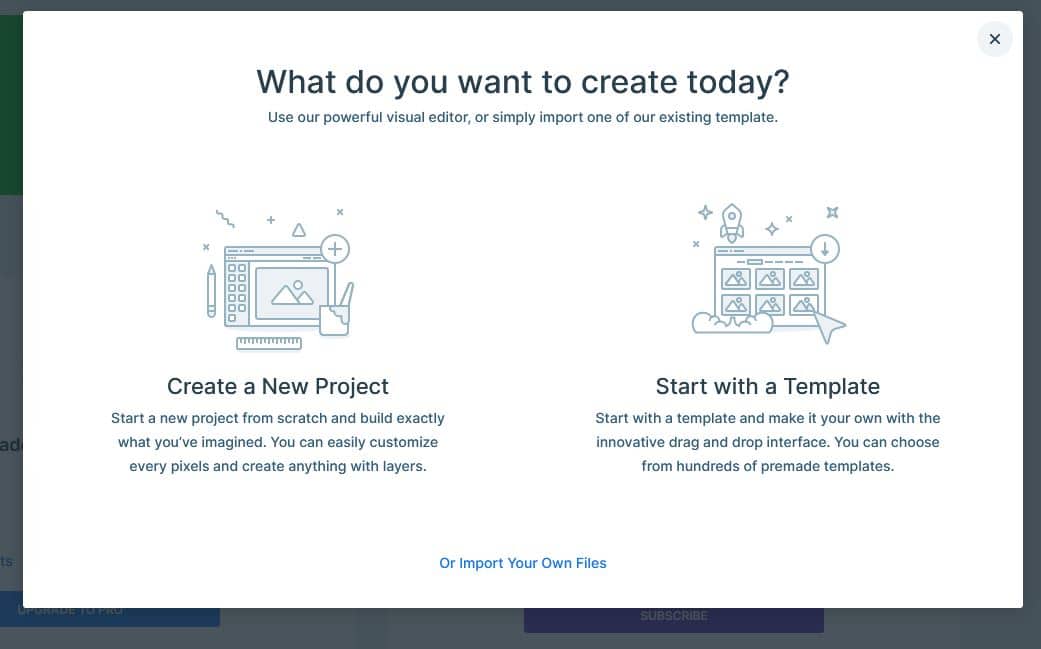
Next we get a choice of creating a new project from scratch or using a template. We are not doing anything fancy in this tutorial, and the controls/settings on the plugin are super easy, so we will select “Create a New Project”:
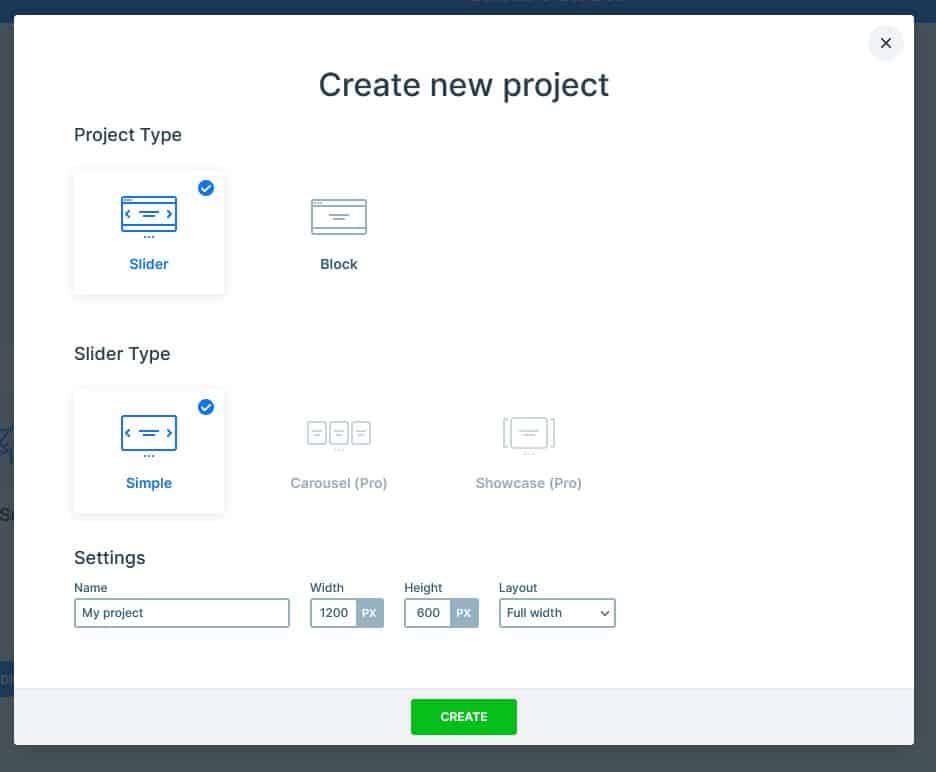
Another option box lets us choose what we are creating. For this we are leaving the defaults, although you might want to give it a better name – “Slider for home page” for example, to better help you identify it later when you have several. Don’t worry too much about the width/height as this can be adjusted later and maybe easier to change after you see it on the page.
OK, now we’ve created the project we need to add the slides. Can you guess what you click next? This is why we love this plugin!

We are going to add an image – so click on that. Or drag and drop your images:
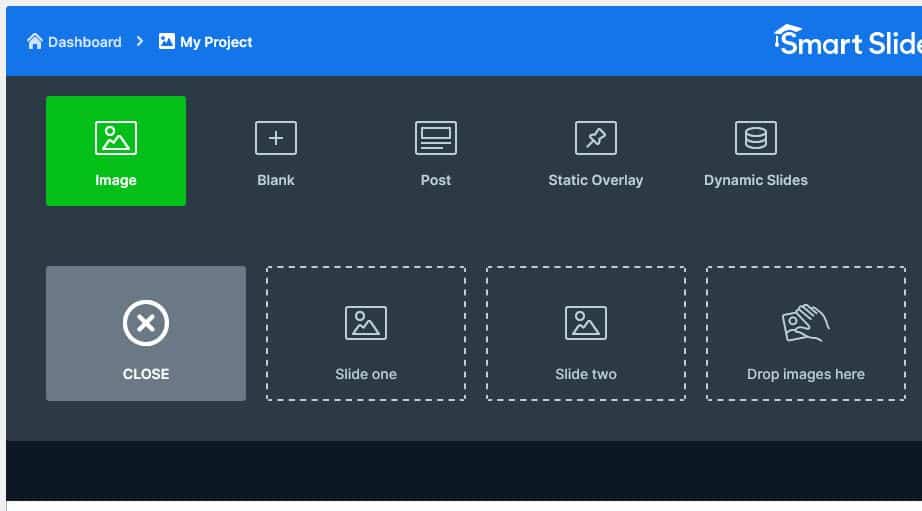
I’ve added three images for our example. As with any image that you use on your website ensure you have permission to be using it. Ours are free stock images from the excellent pexels.com.
Top Tip! Make sure all your images are the same size.

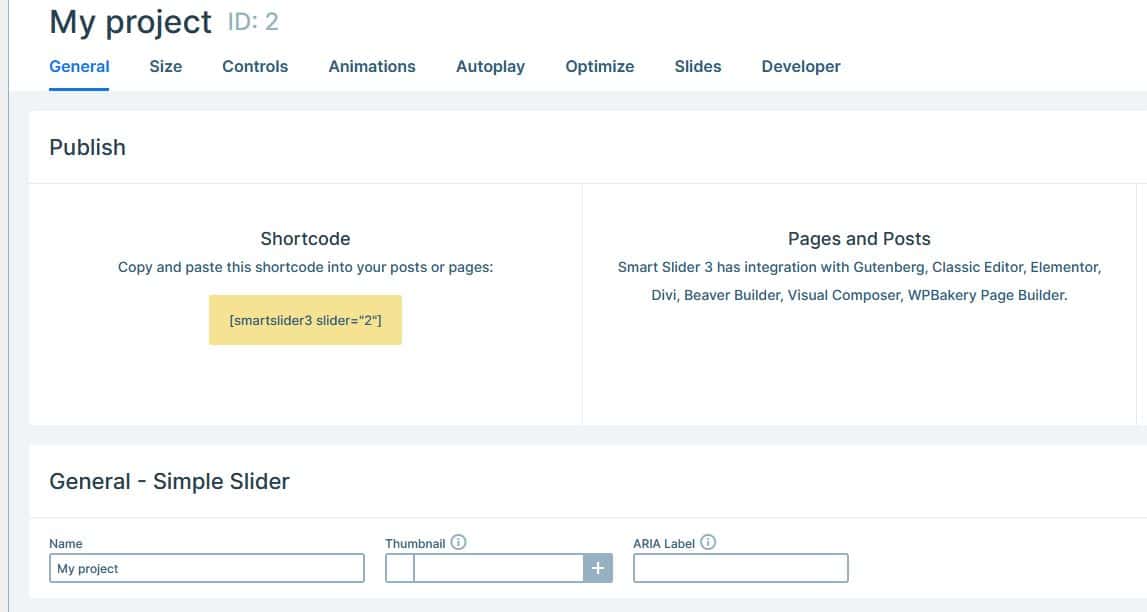
Now that we’ve created our slideshow we need to add it to a page (or post) so that it can be seen. Scrolling down the same project page it gives us clear details on how to do this. Using a shortcode used to be the normal way but very helpfully – under the ‘Pages and Posts’ it notes there is already integration with Gutenberg – which we now call WordPress blocks – and Elementor. So we can now go to the page we want to add our slider too.
If you are using WordPress blocks you should see “Smart Slider 3” in the available blocks, if you are using Elementor you should find “Smart Slider”:

Whichever editor you use the next step will be to choose which of the available sliders you want to use:


Select your slider, save the page, then view it!
When you want to change anything, head back to “Smart Slider” in the main menu then select your project. There are tabs giving us control over many areas. You probably want your slides to change themselves, so go to ‘Autoplay’. Turn it on and the options appear. The main one is ‘Slide Duration’ noting how long each slide will display for. This is in milliseconds (note a millisecond is a thousandth of a second, not a millionth of a second!), so the default of 8000ms is eight seconds. When you make changes click the ‘Save’ button:

Another item that you might want to change is the user controls for changing slides. You can change the type of arrows, position, colour, whether buttons or thumbnails etc. under the “Controls” tab:

Finally, you might also want to change how one slide changes to the next, which is done under the ‘Animations’ tab. The default is the current slide slides to the left as the next one slides in behind it, called the horizontal animation. The next most popular option will be fade (or crossfade) where one fades out as the replacement fades in. Play around – see what works best on your page!

If you need help in setting up Smart Slider, or anything else in WordPress, the Nerds are here to help!