Product Categories
It can be very useful to group the products on your WooCommerce store into categories. This will let your customer find what they are looking for faster and easier.
Create a Product Category
In the main left side menu there is a ‘Categories’ option under ‘Products’:

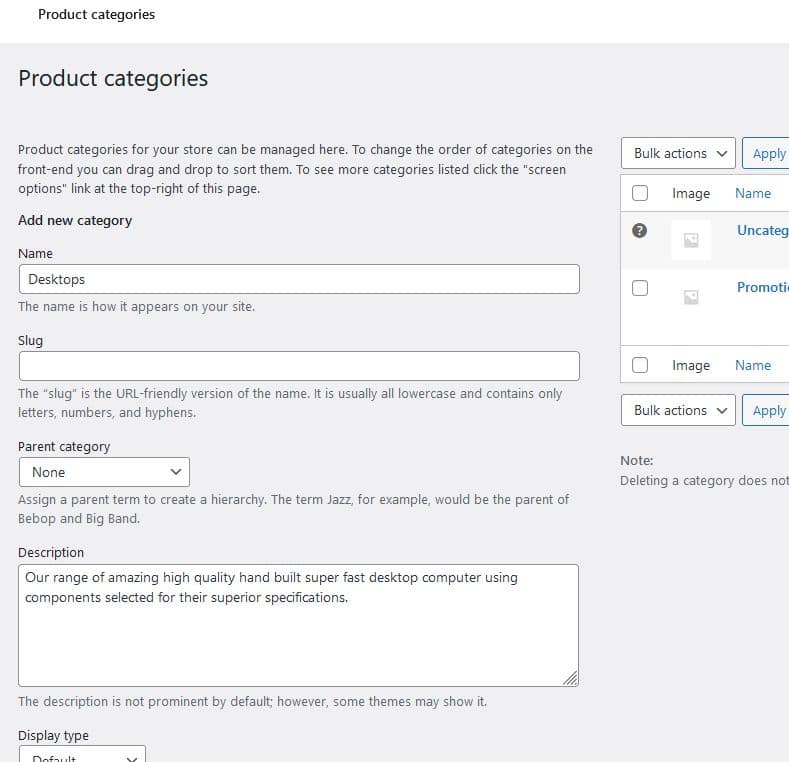
This takes to page displaying all the categories, and has a form for adding a new one.
Name: Give your category an appropriate name
Slug: This can be left blank, and it will be automatically created based on the category name.
Parent category: useful if you are creating a sub-category.
Description: you can add a description of the category. It most cases this is obvious from the title.:
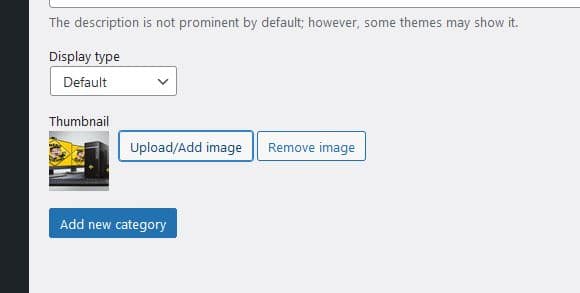
You can add an image for the description page, but the image is not always displayed – it depends on your theme. When you have completed the form click ‘Add new category’:
The category will now show in the category list:

If we hover over the name in this list we get easy options for editing, viewing and others:

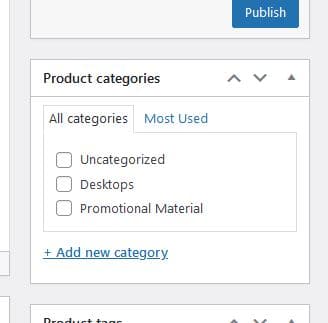
Add Products to the Category
This is done on the product add/edit pages. On these, in the right side menu you will see the category in the ‘Product categories’ list where we can check the appropriate box. We can also add a new category right here, although this method does not allow us to add a description/image for the new category:
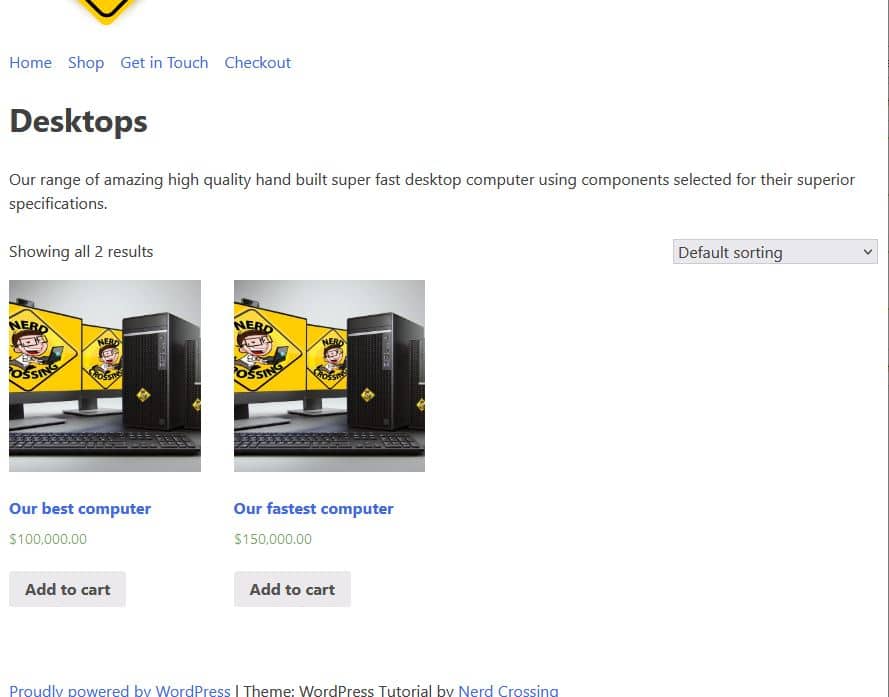
This is our new category page with two products added:
Adding categories to the menu
Your website users need to be able to get to the category page. One option is to add the categories to the menu. For more general information on editing the menu see the menu tutorial.
On the Menus page there is a section for ‘Product categories’ where we can check the appropriate boxes then ‘Add to Menu’:

Here they have been dragged to underneath ‘Shop’ and offset so they appear as a submenu. Don’t forget to save the menu after changes!
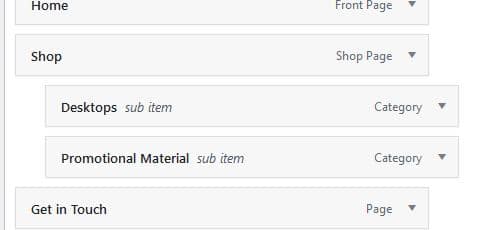
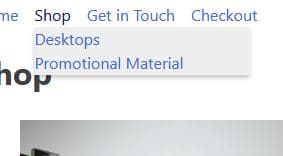
Now when we hover over ‘Shop’ in the navigation menu the two categories show in a sub menu:
Using similar methods you can also add categories links in other places such as in a sidebar.
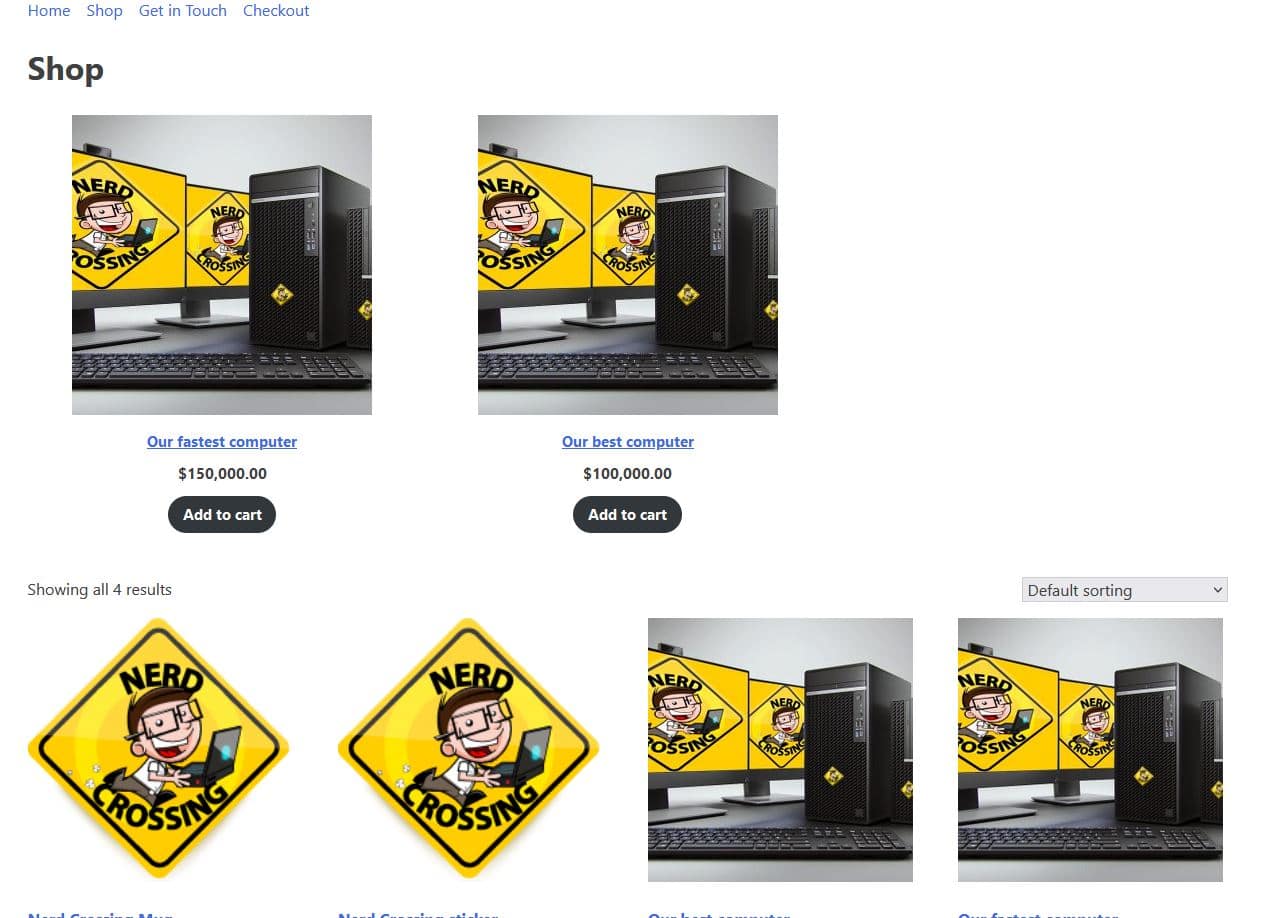
Categories on Shop page
By default the shop page shows your newest products. We can easily add extra content to it. In this example our desktop computer range are our most popular items so we are going so show a few items from the desktop range.
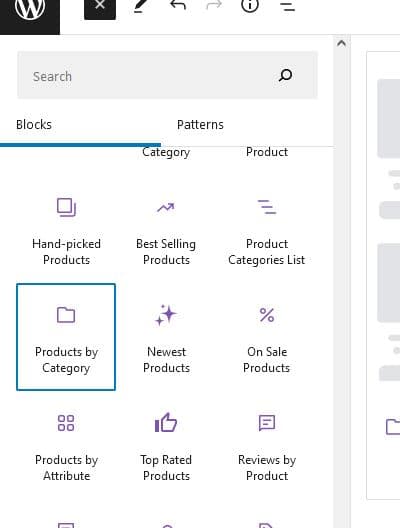
On the edit shop page, there are a number of WooCommerce blocks available, we are going to use ‘Products by Category’:
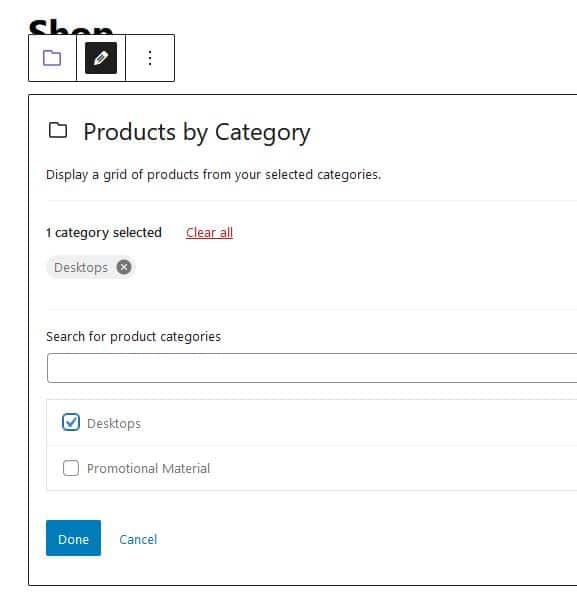
Next, we will select the ‘Desktop’ category then click ‘Done’:
There are further options available in the setting section on right, here you can choose things like how many row/columns of products there will be, and what you want to display for each product:

On our shop page we now have our desktops shown at the top, and we can easily expand this with a title/description:
If you need help with Product Categories – or any aspect of WordPress / WooCommerce – Nerd Crossing are here to help.